make your own curling stones | make your own rink | rink making forum | make your own soccer goal | email us
This page provides information to build a hockey shooter tutor. You hit a target, the puck stays on the ice in front, but a beacon light turns on for 5 seconds to announce that you made a hit. Ours is built into the end boards of our rink, but it could be made portable too?
Why?
Because the foam targets we had always blew away, and the vinyl draped sheet with the image of the goalie never stayed fastened properly. Hitting the top corner from 50 feet down the ice and watching the light go off is very gratisfying.
|
|
|
|
 |
 |
 |
|
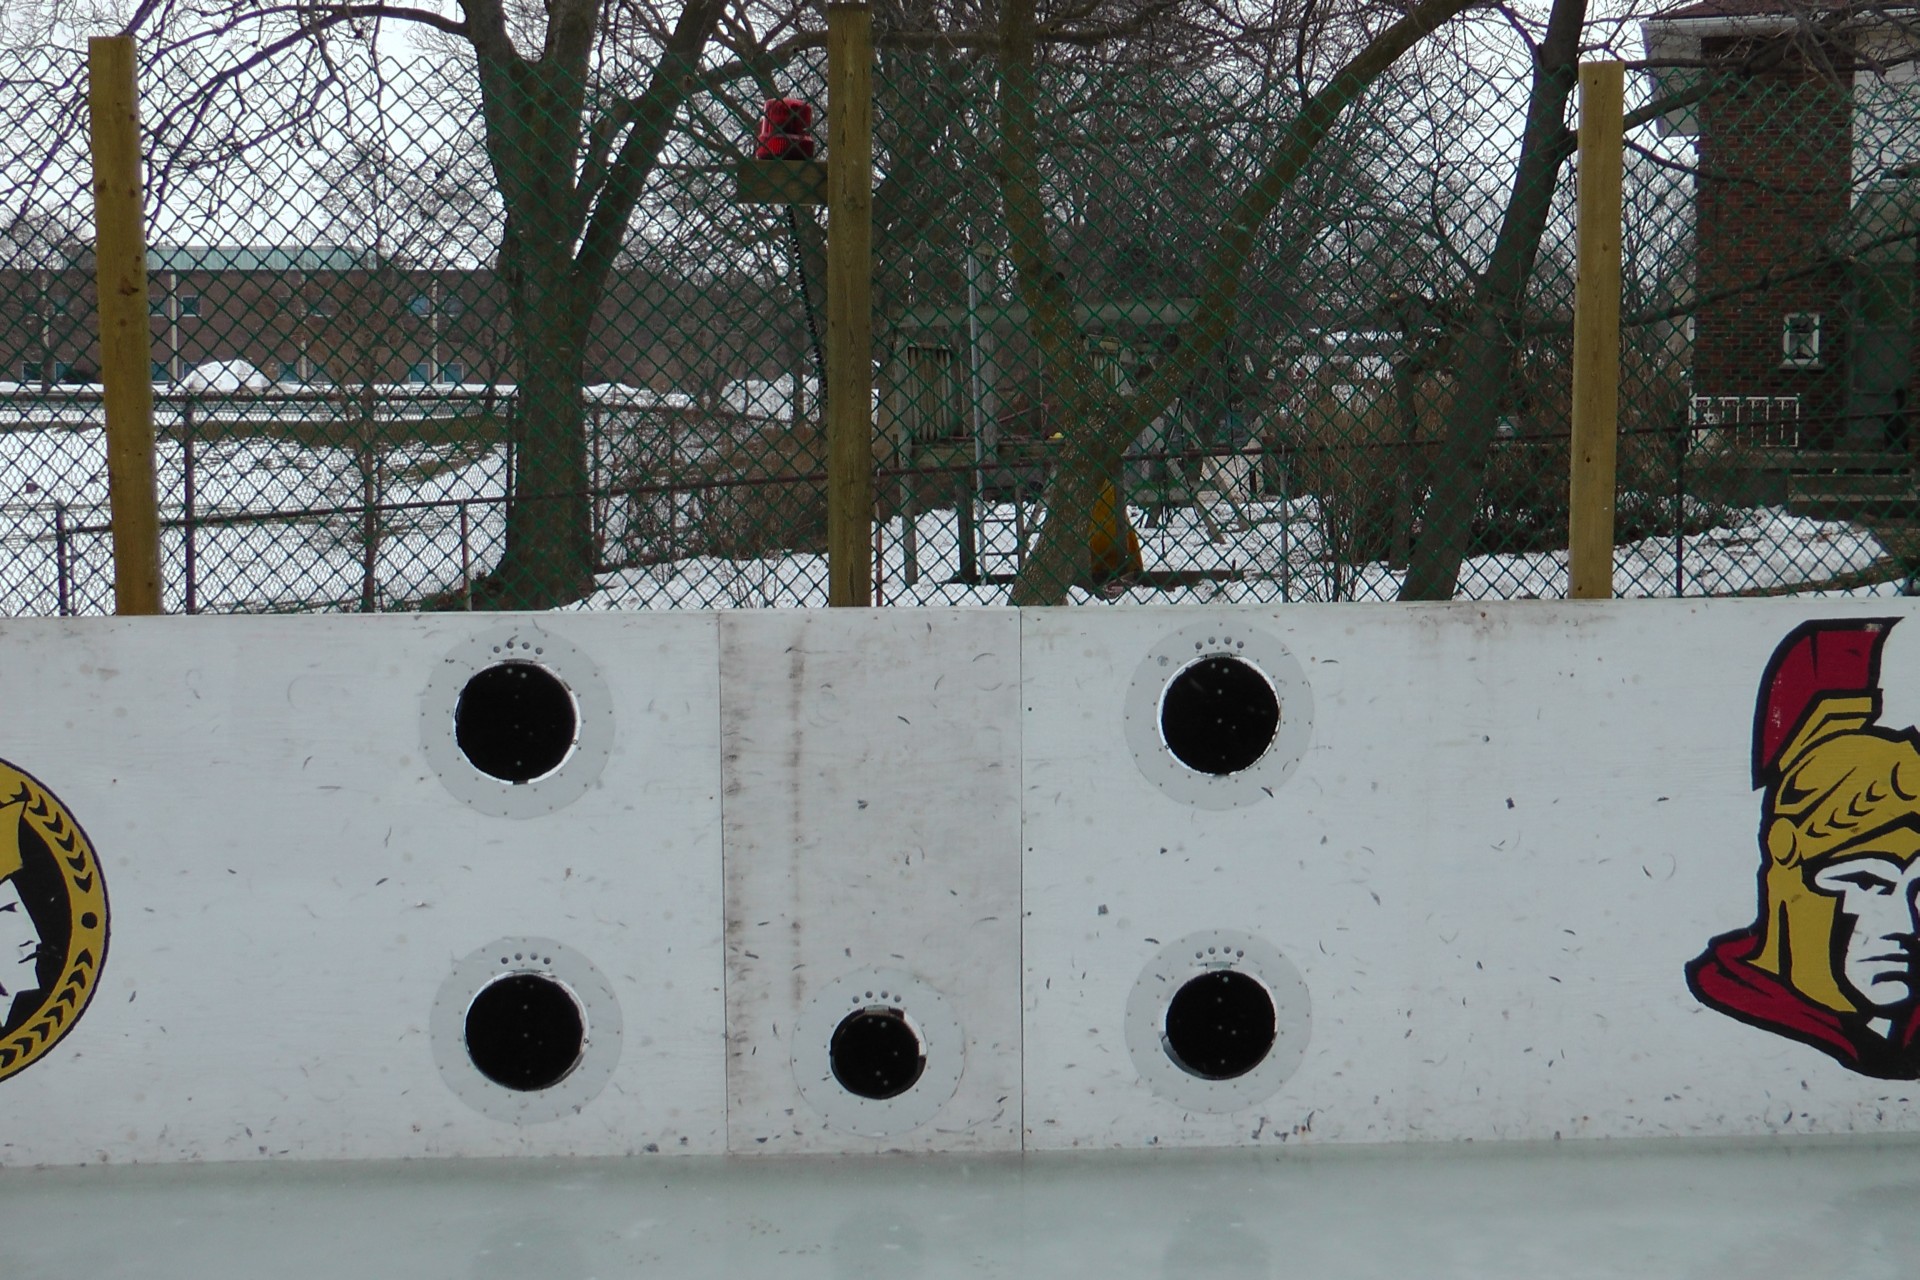
| Image 1 5 flapper targets |
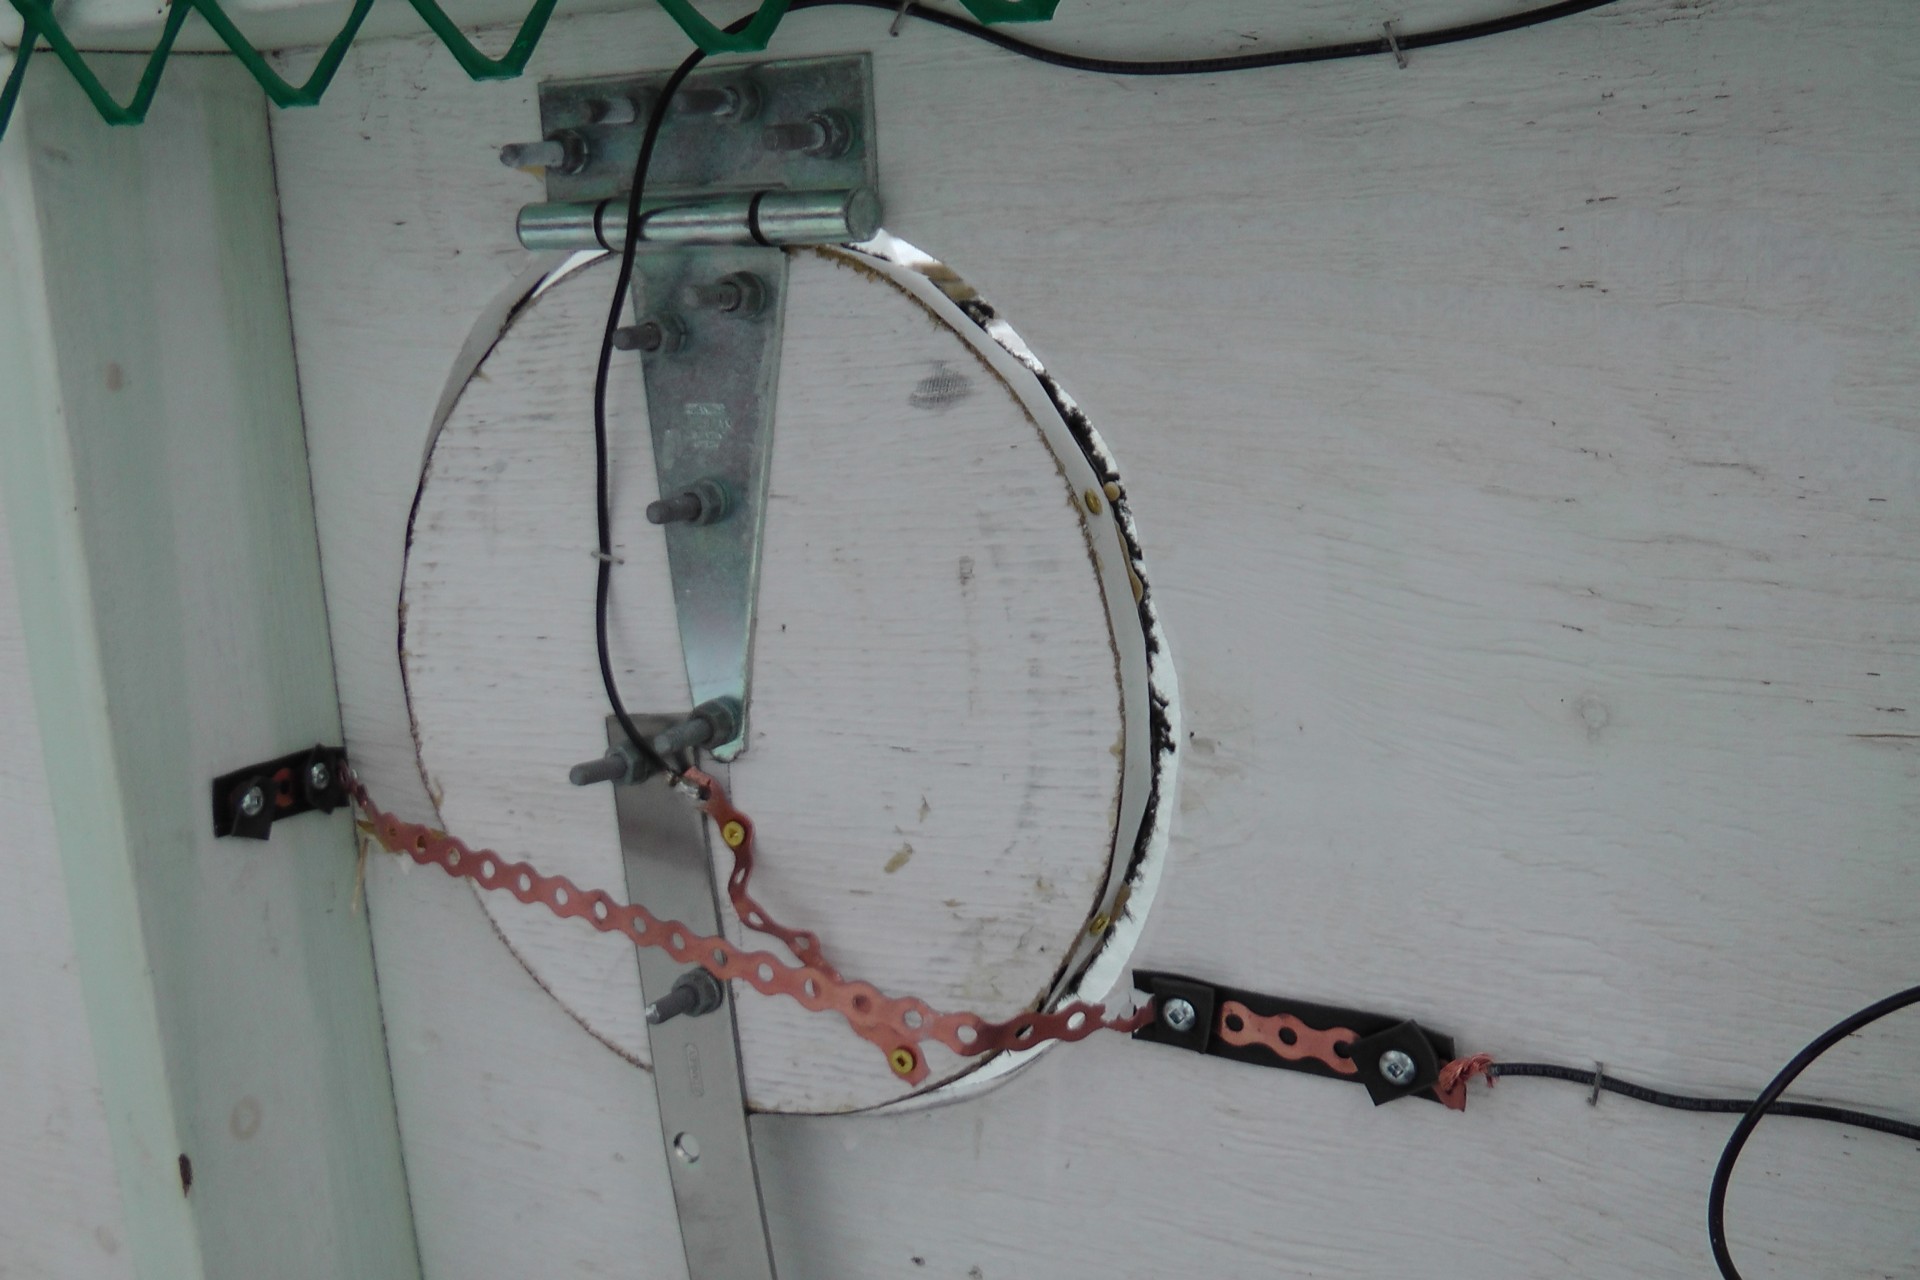
Image 2 flapper detail |
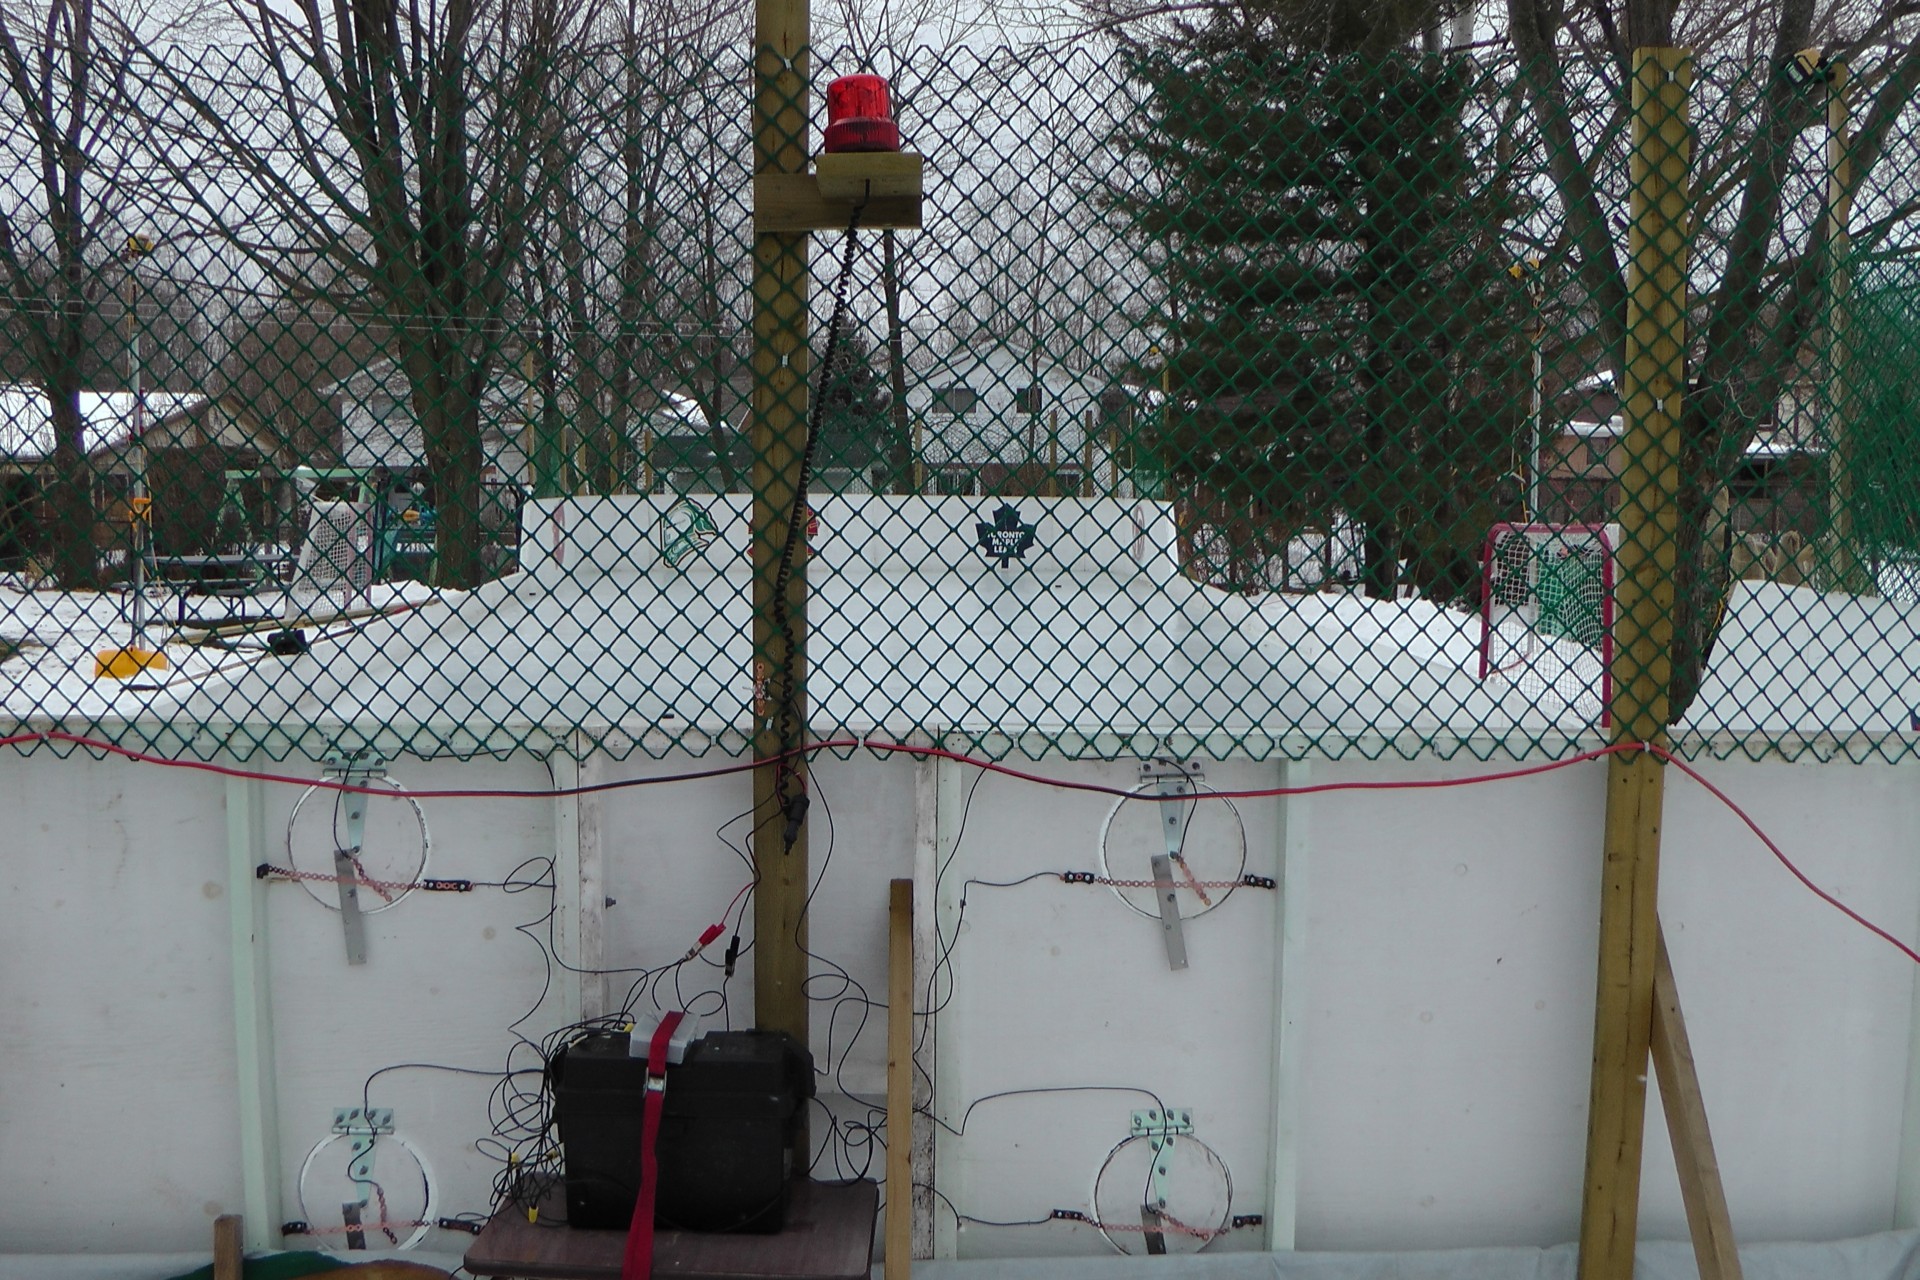
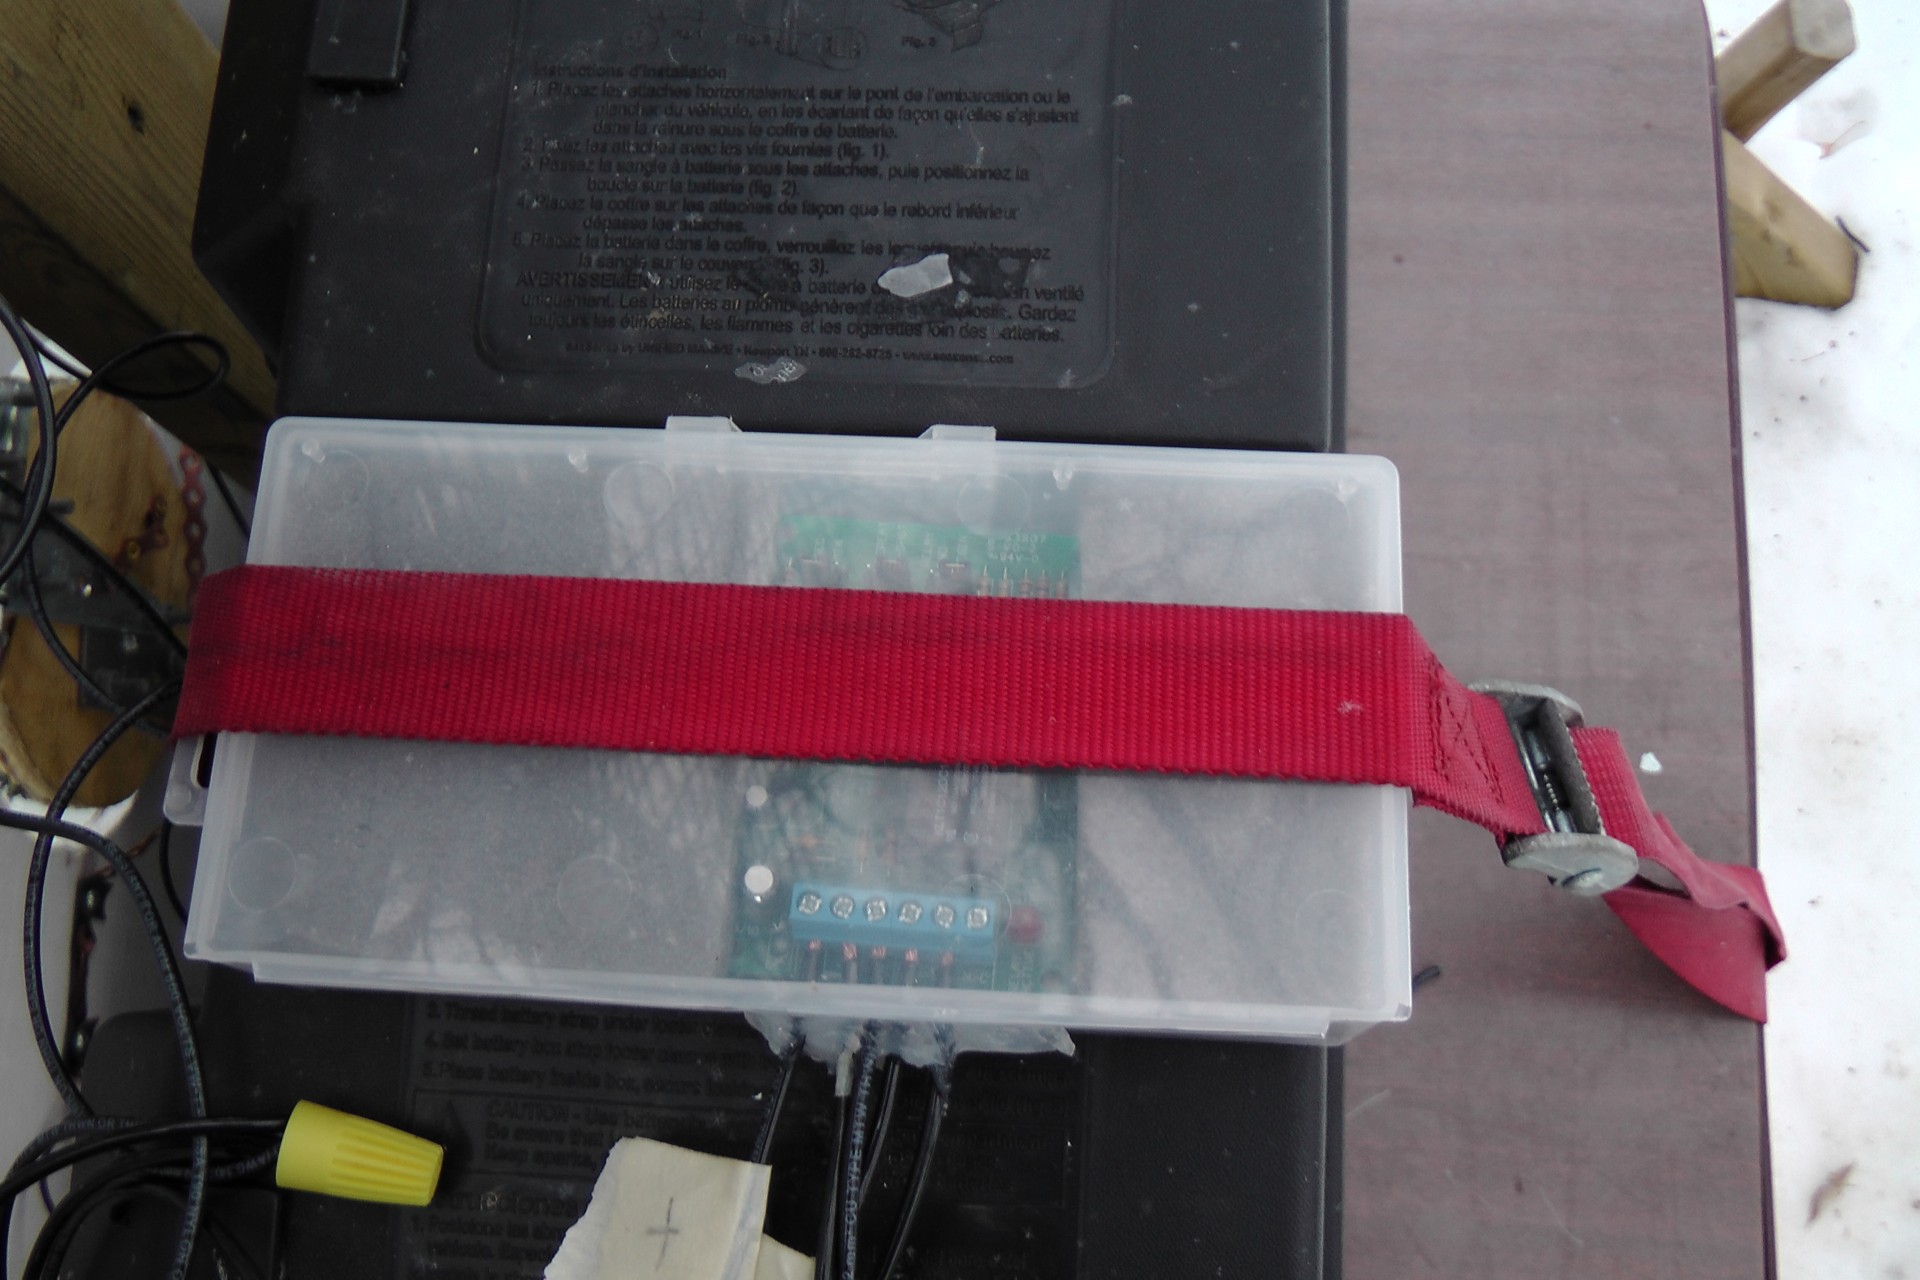
Image 3 back, wiring |
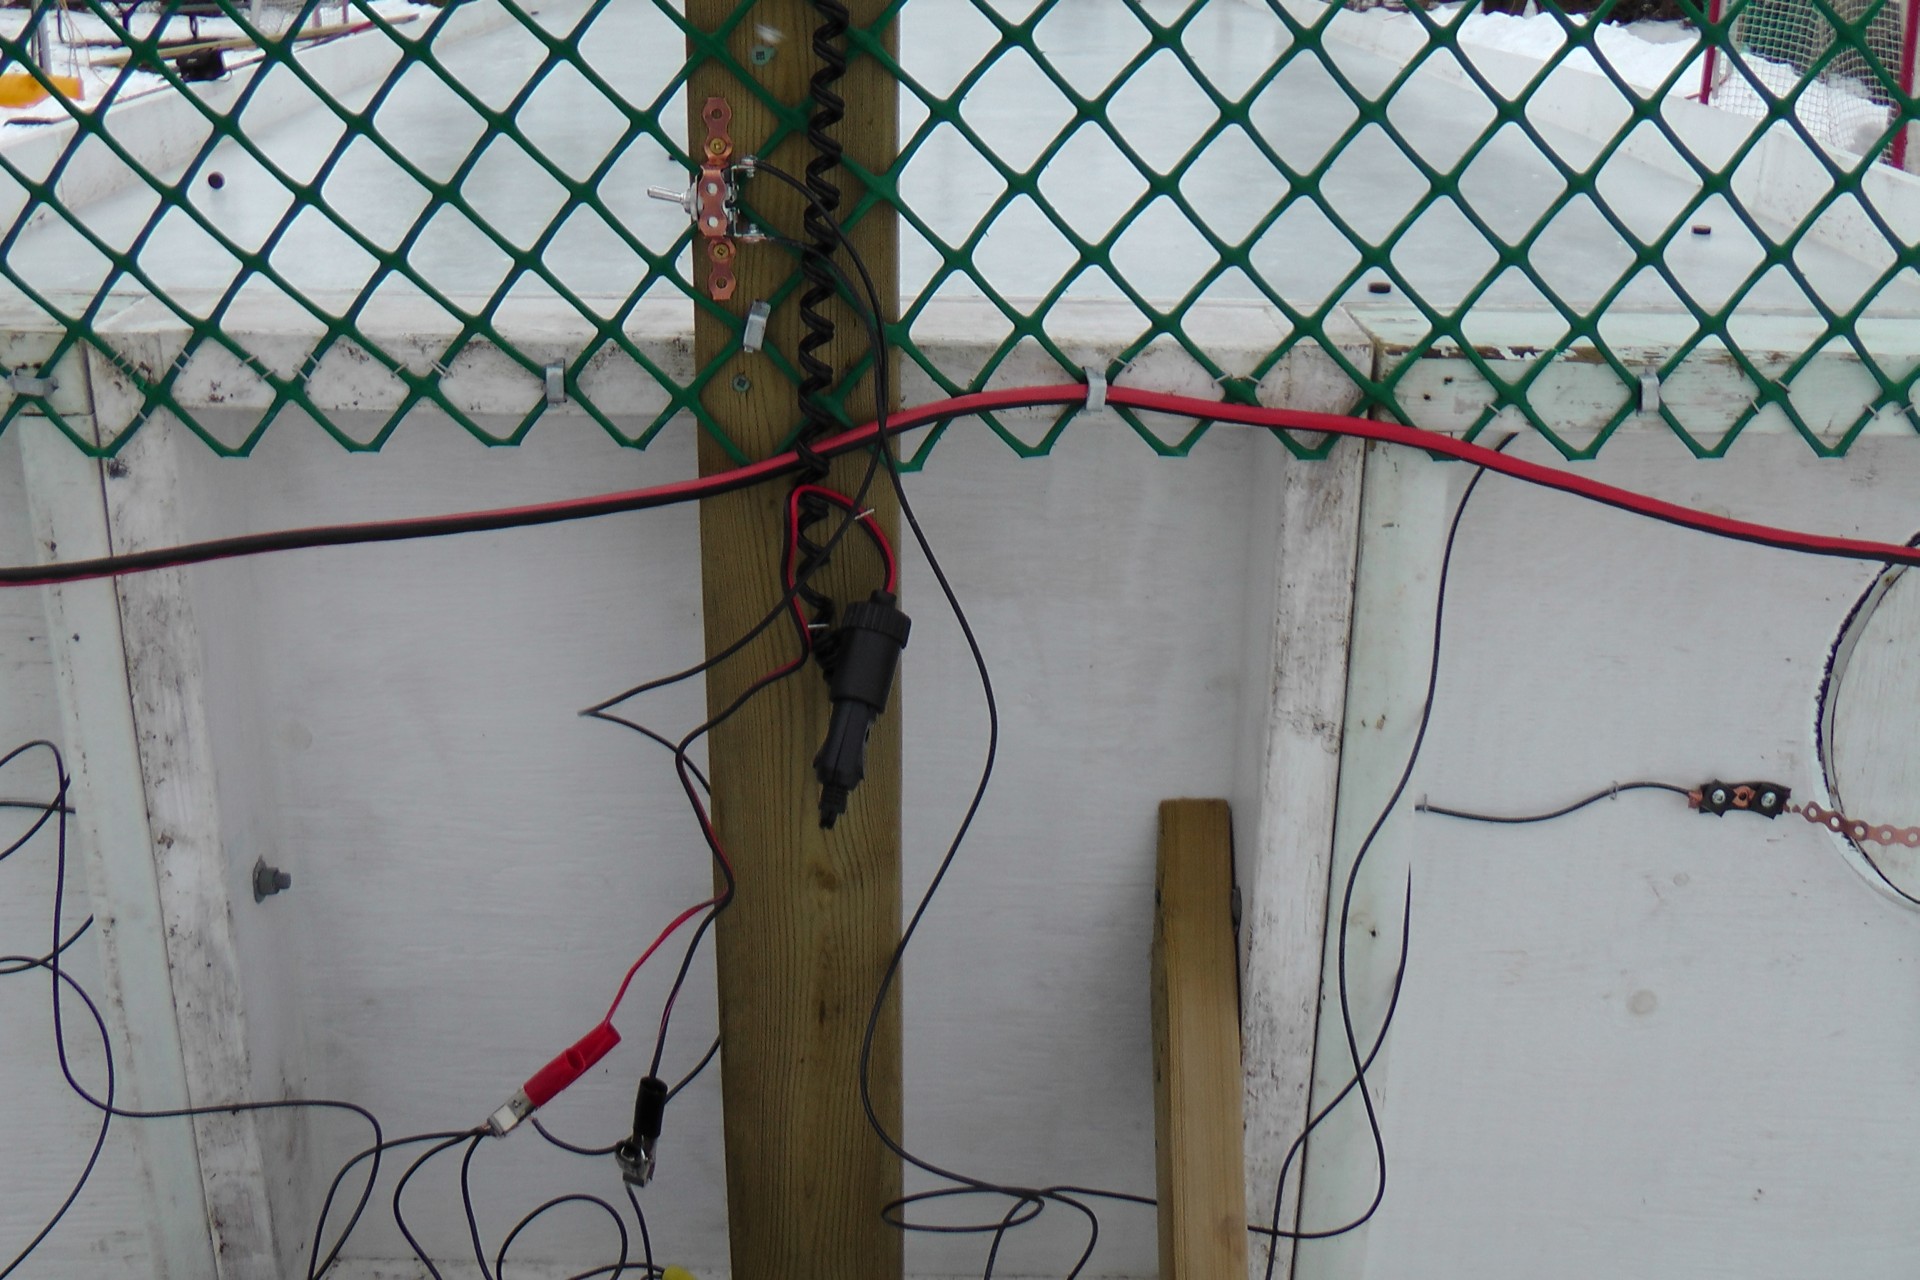
Image 4 on/off switch |
Image 5 delay timer |
Image 6 "schematic" |
Video |
How we did it
A lot of fiddling and a bunch of help from some people at the electro-tech online forum and this forum. If you read those threads you will see how the ideas evolved. The images above are of the final version which runs off a 12V marine battery. The images are self-explanatory?...except maybe for the wiring. Image 6 is Rick Johnston's image from the DIY forum thread based on magnetic switches - but I did not end up using magnetic switches. It is fairly straight forward to merge image 6 with image 2 to figure out how the wiring was adapted to from the magnetic switches to the simple contacts with the copper strapping. I added an on/off switch just in case a big wind storm comes up or squirrels start playing with the flappers : P. Each flapper is 1/2 inch plywood, with old car floormat on the front and some aluminum flashing along the edge. The same aluminum flashing is around the hole to prevent wood chips. The light is called a "rotary beacon" and is available several places online or at your local auto shop. I used 14 guage wiring throughout. There is rubber behind the copper strapping as on rainy days the wood tends to conduct too much electricity and cause the lower flappers to fail. That is the current got "lost" in the boards...at least I think that is what was happening on the soggy day I wired things up for the first time. Regardless, they don't fail now with the rubber "insulation". With the information available here this project should take only a weekend once you get all the parts.
If you make one and/or adapt the design send me an image or two and I will post them if you like!
make your own curling stones | make your own rink | rink making forum | email us